Before cleaning your mirrors, it’s essential to gather all the necessary supplies. This not only streamlines the process but also ensures you have everything at your fingertips, making the job more efficient. For a thorough clean, you’ll need a few basic items: a soft microfiber cloth, a spray bottle, and a suitable cleaning solution.
If you prefer a more eco-friendly approach, consider using vinegar and water as your cleaning solution. Additionally, having a squeegee on hand can be beneficial, especially for larger mirrors or those in high-humidity areas like bathrooms. A step ladder may also be necessary if you’re tackling tall mirrors or those positioned above furniture.
By preparing your supplies in advance, you set yourself up for success and can focus on achieving that crystal-clear finish. Contact us now!
Key Takeaways
- Gather all your cleaning supplies before starting the process
- Dust the mirror to remove any loose particles and dirt
- Create a cleaning solution using water and vinegar or a commercial glass cleaner
- Apply the cleaning solution to the mirror using a spray bottle or a clean cloth
- Wipe the mirror in a circular motion to remove any streaks and smudges
- Address stubborn streaks by using a microfiber cloth or newspaper to buff them out
- Clean the frame of the mirror using a separate cloth and cleaning solution
- Dry the mirror using a dry, lint-free cloth to prevent water spots
- Polish the mirror with a glass cleaner or a mixture of water and rubbing alcohol
- Prevent future streaks by using a squeegee or microfiber cloth after showers and regularly maintaining the mirror
- Maintenance tips include cleaning the mirror regularly, avoiding harsh chemicals, and using a soft cloth for cleaning
Dust the Mirror
Before applying any cleaning solution, it’s crucial to dust the mirror’s surface. Dust and debris can create unsightly smudges when wet, so starting with a dry cloth is key. Gently wipe the mirror with your microfiber cloth to remove any loose particles.
This step is often overlooked but is vital for achieving a streak-free shine. In Australia, where dust can accumulate rapidly due to the dry climate, regular dusting is crucial. Make it a habit to check your mirrors weekly, especially in high-traffic areas like bathrooms and hallways.
Not only will this keep your mirrors looking their best, but it will also make the actual cleaning process much smoother.
Create a Cleaning Solution
:max_bytes(150000):strip_icc()/diy-cleaning-solutions-4799139-hero-option-a16577dbbca44b05a87b06883601c2ac.jpg)
Once your mirror is dust-free, it’s time to whip up your cleaning solution. If you’re opting for a commercial cleaner, ensure it’s suitable for glass surfaces and free from harsh chemicals that could damage the mirror’s reflective coating. Alternatively, a simple homemade solution can be just as effective.
Mix equal parts of white vinegar and water in a spray bottle for an eco-friendly option that cuts through grime without leaving harmful residues. For those who prefer a more traditional approach, a few drops of dish soap mixed with warm water can also do wonders. The key is to avoid overly soapy solutions, as they can leave streaks behind.
Whichever method you choose, ensure your cleaning solution is well-mixed and ready for application.
Apply the Cleaning Solution
With your cleaning solution prepared, it’s time to apply it to the mirror. Spray the solution directly onto the surface of the mirror, but be careful not to oversaturate it. A light misting is all that’s needed to effectively break down any dirt or grime.
If you’re using vinegar, you’ll appreciate its natural ability to cut through soap scum and water spots, particularly in bathrooms where moisture can lead to build-up. When applying the solution, work from top to bottom. This technique prevents any drips from running down onto already cleaned areas, ensuring an even clean throughout.
For larger mirrors, consider sectioning off the surface into manageable areas to ensure thorough coverage without missing spots.
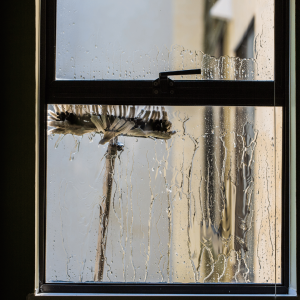
Wipe the Mirror
Now comes the satisfying part: wiping down the mirror. Using your microfiber cloth, start at the top corner and work your way down in a zigzag motion. This method helps to lift dirt and grime effectively while reducing the chances of streaks forming.
Microfiber cloths are particularly effective because they trap dust and dirt without scratching the surface. If you notice any stubborn spots or areas that require extra attention, don’t hesitate to give them a little more elbow grease. The key is to maintain a consistent motion and pressure throughout the process to achieve that flawless finish we all desire.
Address Stubborn Streaks
Even with the best intentions, stubborn streaks can sometimes linger after your initial clean. If you find yourself facing this issue, don’t fret; there are ways to tackle these pesky marks. First, try using a clean section of your microfiber cloth or switch to a fresh one entirely.
Sometimes, using a dirty cloth can inadvertently add more streaks rather than remove them. For particularly stubborn streaks, consider using a small amount of rubbing alcohol on a clean cloth. This can help dissolve any residue that may be causing the streaks without damaging the mirror’s surface.
Remember to apply it sparingly and follow up with a dry cloth to buff away any remaining moisture.
Clean the Frame
While the mirror itself often takes centre stage, don’t forget about its frame! Dust and grime can accumulate around the edges, detracting from the overall appearance of your mirror. Depending on the material of your frame—be it wood, metal, or plastic—your cleaning method may vary slightly.
For wooden frames, use a damp cloth with a mild soap solution to wipe down the surface gently. Avoid soaking the wood, as excess moisture can warp or damage it over time. For metal or plastic frames, a simple wipe with your cleaning solution should suffice.
Always ensure that you dry the frame thoroughly after cleaning to prevent any moisture from causing damage.
Dry the Mirror
After wiping down your mirror and frame, it’s crucial to dry everything properly. Leaving moisture on the surface can lead to streaks and spots forming as it dries naturally. Use a clean, dry microfiber cloth to buff away any remaining moisture on the mirror’s surface.
For larger mirrors or those in humid environments, consider using a squeegee for an even quicker drying process. This tool can help remove excess water efficiently while leaving behind a streak-free finish. Remember that drying is just as important as cleaning; taking this extra step will ensure your mirrors remain sparkling for longer.
Polish the Mirror
Once your mirror is clean and dry, it’s time for that final touch: polishing! Polishing not only enhances the shine but also helps protect against future smudges and streaks. You can use a dedicated glass polish or simply buff with a clean microfiber cloth in circular motions.
This step is particularly beneficial for mirrors in high-traffic areas or those exposed to humidity, as it creates a barrier against moisture build-up and grime accumulation. A little extra effort in polishing can go a long way in maintaining that pristine look.
Prevent Future Streaks
To keep your mirrors looking their best for longer periods, consider implementing some preventive measures. One effective strategy is to regularly dust your mirrors as part of your cleaning routine—this will help minimise build-up and make deep cleans easier. Additionally, if you live in an area prone to high humidity—like many coastal regions in Australia—consider using an anti-fog spray designed for mirrors in bathrooms.
This can help reduce moisture accumulation and prevent streaks from forming after showers or baths.
Maintenance Tips
Maintaining clean mirrors doesn’t have to be an arduous task; with a few simple tips, you can keep them looking fabulous year-round. First and foremost, establish a regular cleaning schedule—aim for at least once every month or more frequently if needed. When cleaning your mirrors, always use soft materials like microfiber cloths to avoid scratches and damage.
Avoid using paper towels or rough fabrics that could mar the surface over time. Lastly, keep an eye on environmental factors; if you notice increased humidity or dust in your home due to seasonal changes, adjust your cleaning frequency accordingly. How TASPRO Can Help. At TASPRO, we understand that maintaining a clean home or office can be challenging amidst busy schedules and daily responsibilities.
That’s why we offer professional cleaning services tailored to meet your needs—whether it’s end-of-lease cleaning or regular office cleaning. Our team is equipped with eco-friendly products and expert techniques to ensure your mirrors—and all surfaces—shine bright without compromising safety or quality standards. If you’re looking for hassle-free cleaning solutions that deliver results every time, we’re here to help.
Ready to see how we can transform your space? Get a quote online today and let us take care of the cleaning while you enjoy your sparkling mirrors!
If you’re interested in learning more about maintaining a spotless home, you might find the article on end-of-lease cleaning particularly useful. This guide provides comprehensive tips and strategies for ensuring every corner of your home is pristine, which complements the techniques discussed in “How To Clean A Mirror.” Whether you’re preparing to move out or simply want to keep your living space in top condition, these resources offer valuable insights into effective cleaning practices.
FAQs
What supplies do I need to clean a mirror?
You will need a microfiber cloth or paper towels, a spray bottle filled with water or glass cleaner, and possibly a squeegee for larger mirrors.
How often should I clean my mirrors?
It is recommended to clean mirrors at least once a week to prevent the buildup of dirt, dust, and smudges.
What is the best way to clean a mirror?
Spray the mirror with water or glass cleaner, then wipe it down with a microfiber cloth or paper towels in a circular motion to remove any streaks or smudges.
Can I use vinegar to clean a mirror?
Yes, a solution of equal parts water and vinegar can be used to effectively clean mirrors and remove streaks.
How do I prevent streaks when cleaning a mirror?
To prevent streaks, use a microfiber cloth or paper towels to wipe the mirror in a circular motion, and avoid using too much cleaning solution. A squeegee can also help to prevent streaks on larger mirrors.