Vinyl roller shades have become a popular choice for homeowners and renters alike, thanks to their versatility, affordability, and ease of maintenance. These window coverings not only provide privacy and light control but also add a touch of style to any room. Available in a variety of colours and patterns, vinyl roller shades can complement any décor, making them a favourite among property managers and small office owners as well.
However, like any other household item, they can suffer wear and tear over time, leading to unsightly tears that can detract from their overall appearance. Understanding how to repair these shades can save you money and extend their lifespan. Instead of replacing the entire shade, which can be costly, learning to fix minor damages can be a practical solution.
In this guide, we will walk you through the process of identifying tears, gathering necessary materials, and executing repairs effectively. Whether you’re a homeowner looking to maintain your living space or a property manager aiming to keep rental properties in top shape, this guide will equip you with the knowledge needed to tackle vinyl roller shade repairs confidently. Contact us now!
Key Takeaways
- Vinyl roller shades are a popular window treatment option known for their durability and affordability.
- A torn vinyl roller shade can be identified by examining the shade for any visible tears or holes.
- Materials needed for repairing a torn vinyl roller shade include a repair kit, scissors, and a clean cloth.
- Preparing the work area involves laying the shade flat on a clean surface and ensuring that the area is well-lit.
- Small tears in a vinyl roller shade can be repaired using a clear adhesive and a small brush for application.
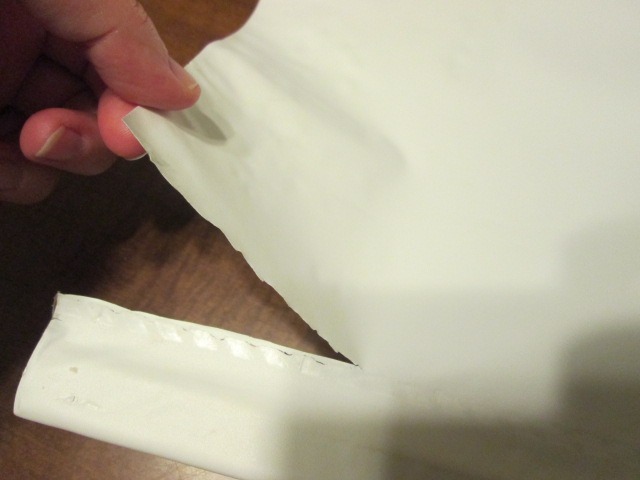
Identifying a Torn Vinyl Roller Shade
Before diving into repairs, it’s essential to accurately identify the type and extent of the damage. Small tears may be barely noticeable but can worsen if left unattended. Look for frayed edges or small rips that disrupt the smooth surface of the shade.
These minor imperfections can often be repaired with simple techniques, allowing you to restore the shade’s functionality without much hassle. On the other hand, larger tears may require more extensive repairs or even replacement. If the tear is more than a few inches long or if the fabric has become detached from the roller mechanism, it’s crucial to assess whether a patch or complete replacement is the best course of action.
By understanding the nature of the damage, you can determine the most effective repair method and ensure that your vinyl roller shades continue to serve their purpose effectively.
Materials Needed for Repairing a Torn Vinyl Roller Shade
Having the right materials on hand is crucial for a successful repair job.
Here’s a list of items you’ll need:
Vinyl adhesive: A strong adhesive specifically designed for vinyl will ensure a durable bond.
Scissors: For trimming any frayed edges or excess material.
Vinyl patch: If you’re dealing with larger tears, having a piece of matching vinyl on hand will be essential.
Ruler or measuring tape: To measure the size of the tear and any patches accurately.
Cloth or sponge: For cleaning the area around the tear before applying adhesive.
Weight or clamp: To hold the patch in place while the adhesive dries. Gathering these materials before starting your repair will streamline the process and help you avoid unnecessary interruptions.
It’s also wise to choose high-quality products that are suitable for vinyl to ensure a long-lasting repair.
Preparing the Work Area
Creating an efficient workspace is vital for any repair project. Start by selecting a clean, well-lit area where you can comfortably work on your vinyl roller shades. Lay down a drop cloth or old towel to protect your surfaces from any adhesive spills or debris.
Ensure that you have all your materials within reach to minimise distractions during the repair process. Before beginning repairs, take a moment to clean the area around the tear. Dust and dirt can interfere with adhesive application, leading to subpar results.
Use a damp cloth or sponge to wipe down the surface of the shade, allowing it to dry completely before proceeding. A tidy workspace not only enhances your focus but also contributes to a more professional-looking repair.
Repairing Small Tears in a Vinyl Roller Shade
For small tears, the repair process is relatively straightforward. Begin by trimming any frayed edges with scissors to create a clean line. This step is crucial as it helps prevent further tearing and ensures that the adhesive adheres properly.
Once you’ve prepared the edges, apply a thin layer of vinyl adhesive directly onto the tear. Press the edges of the tear together firmly, ensuring that they align correctly. You may want to use a weight or clamp to hold them in place while the adhesive sets.
Follow the manufacturer’s instructions regarding drying time; typically, it’s best to leave it undisturbed for at least 30 minutes to an hour. After this period, check that the bond is secure before moving on.
Repairing Large Tears in a Vinyl Roller Shade

When faced with larger tears, you’ll need to take additional steps to ensure a successful repair. Start by assessing whether the tear is manageable or if it would be more prudent to replace the shade entirely. If you decide to proceed with repairs, begin by cutting a vinyl patch that extends at least an inch beyond the edges of the tear on all sides.
Apply vinyl adhesive around the perimeter of the tear and on one side of your patch. Carefully position the patch over the tear, ensuring it covers all damaged areas completely. Press down firmly and use weights or clamps to hold it in place while it dries.
Depending on the size of the patch and adhesive used, drying times may vary, so be sure to follow product guidelines closely.
Patching a Vinyl Roller Shade
Patching is an effective method for repairing both small and large tears in vinyl roller shades. When selecting your patch material, aim for a piece that closely matches your existing shade in colour and texture for a seamless look. If you’re unable to find an exact match, consider using fabric dye or paint designed for vinyl to achieve a closer resemblance.
Once you have your patch ready, follow similar steps as outlined for larger tears: apply adhesive around the tear and on one side of your patch before positioning it carefully over the damaged area. After securing it in place with weights or clamps, allow ample time for drying before testing its durability.
Reattaching the Vinyl to the Roller
If your vinyl roller shade has become detached from its roller mechanism during repairs, reattaching it is essential for proper functionality. Begin by carefully unwinding any remaining vinyl from the roller and cleaning both surfaces thoroughly. Apply a generous amount of vinyl adhesive along the edge of the roller where it will meet the shade.
Carefully align the edge of your vinyl shade with the adhesive-covered roller and press down firmly. It’s important to ensure that it’s straight and evenly attached; otherwise, it may not roll up correctly later on. Once secured, allow sufficient time for drying before testing its operation.
Testing the Repaired Vinyl Roller Shade
After completing your repairs, it’s time to put your handiwork to the test. Gently pull down on the shade to see if it rolls smoothly without any resistance or snagging at the repaired areas. If everything appears in order, try raising and lowering it several times to ensure that it functions as intended.
If you notice any issues during testing—such as sticking or uneven rolling—reassess your repairs and make adjustments as necessary. It’s better to address any problems now than wait until they worsen over time.
Tips for Preventing Future Tears in Vinyl Roller Shades
Prevention is always better than cure when it comes to maintaining your vinyl roller shades.
Here are some practical tips to help you avoid future tears:
Avoid excessive pulling: Be gentle when raising or lowering your shades; excessive force can lead to tears.
Keep them clean: Regularly dusting or wiping down your shades can prevent dirt buildup that may weaken the material over time.
Use child-safe mechanisms: If you have children or pets at home, consider installing child-safe mechanisms that reduce wear on shades.
Store properly: If you need to remove shades for cleaning or storage, roll them up carefully without twisting or folding.
By implementing these simple practices, you can prolong the life of your vinyl roller shades and maintain their appearance for years to come.
Conclusion and Final Thoughts
Repairing torn vinyl roller shades doesn’t have to be an overwhelming task; with some basic materials and techniques, you can restore them effectively and affordably. Whether you’re dealing with small tears or larger damage, understanding how to assess and fix these issues will empower you as a homeowner or property manager. Remember that regular maintenance plays a crucial role in preventing future damage.
By taking care of your shades and addressing any issues promptly, you can enjoy their benefits without interruption. If you’re looking for professional assistance with cleaning or maintaining your home or office space, TASPRO is here to help! Our team offers services tailored specifically for homeowners, renters, property managers, and small offices across Australia.
Get in touch today for an online quote and let us help keep your spaces looking their best!
If you’re looking to maintain the pristine condition of your home beyond just repairing a torn vinyl roller shade, you might find it beneficial to explore other aspects of home care. For instance, keeping your outdoor spaces clean can significantly enhance the overall appearance of your home. A related article that might interest you is about pressure washing, which provides insights into effectively cleaning exterior surfaces. This method can help remove dirt, mold, and grime, ensuring that your home looks as good on the outside as it does on the inside.
FAQs
What is a vinyl roller shade?
A vinyl roller shade is a window covering made of vinyl material that can be rolled up or down to control the amount of light and privacy in a room.
How can I repair a torn vinyl roller shade?
To repair a torn vinyl roller shade, you can use a vinyl repair kit that includes adhesive and patches specifically designed for vinyl material. Clean the torn area, apply the adhesive, and then place the patch over the tear.
Can I repair a large tear in a vinyl roller shade?
Yes, you can repair a large tear in a vinyl roller shade using a vinyl repair kit. However, if the tear is too large or the shade is heavily damaged, it may be more cost-effective to replace the shade altogether.
Are there any alternatives to repairing a torn vinyl roller shade?
If the tear in the vinyl roller shade is extensive, you may consider replacing the shade with a new one. Additionally, you can also consider consulting a professional for repair or replacement options.
How can I prevent tears in my vinyl roller shade?
To prevent tears in your vinyl roller shade, handle it with care when rolling it up or down. Avoid pulling on the material too forcefully, and be mindful of any sharp objects that could potentially cause damage.