Deep cleaning kitchen appliances is an essential aspect of maintaining a healthy and efficient cooking environment. Over time, appliances accumulate grime, grease, and food particles that can harbor bacteria and unpleasant odors. Regular cleaning not only enhances the aesthetic appeal of the kitchen but also ensures that appliances function optimally.
For instance, a refrigerator filled with expired food or a microwave with splattered remnants can lead to cross-contamination and foodborne illnesses. By committing to deep cleaning, homeowners can significantly reduce these risks, creating a safer space for food preparation. Moreover, deep cleaning appliances can extend their lifespan.
Many kitchen devices are significant investments, and neglecting their upkeep can lead to premature wear and tear. For example, a dirty oven may require more energy to maintain the desired temperature, leading to increased utility bills and potential breakdowns. By regularly deep cleaning appliances, individuals can ensure they operate efficiently, saving both money and resources in the long run.
This proactive approach not only promotes hygiene but also fosters a sense of pride in one’s kitchen. Contact us now!
Key Takeaways
- Deep cleaning kitchen appliances is important for maintaining hygiene and extending the lifespan of the appliances.
- Preparation for deep cleaning involves gathering necessary cleaning supplies and removing food items from the appliances.
- Deep cleaning the refrigerator involves removing all food items, shelves, and drawers for thorough cleaning and sanitizing.
- Deep cleaning the oven requires removing racks, using a cleaning solution, and scrubbing away built-up grease and food residue.
- Deep cleaning the microwave involves heating a bowl of water and vinegar, wiping down the interior, and cleaning the turntable and door.
Preparation for Deep Cleaning
Before embarking on the deep cleaning journey, it is crucial to gather the necessary supplies and create a conducive environment. Start by assembling cleaning agents such as vinegar, baking soda, dish soap, and specialized appliance cleaners. These products are effective in breaking down tough stains and eliminating odors without being overly harsh on surfaces.
Additionally, having microfiber cloths, sponges, scrub brushes, and a vacuum cleaner on hand will facilitate the cleaning process. Equally important is the preparation of the workspace. Clear countertops and remove any items that may obstruct access to appliances.
This not only makes the cleaning process more efficient but also ensures that no items are accidentally damaged or soiled during the deep cleaning. It is advisable to work systematically, tackling one appliance at a time to avoid feeling overwhelmed. By organizing the cleaning process, individuals can maintain focus and achieve thorough results.
Deep Cleaning the Refrigerator
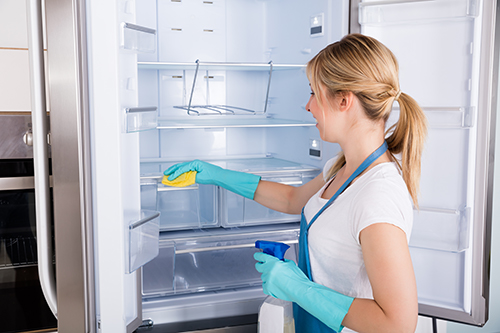
The refrigerator is often considered the heart of the kitchen, making its cleanliness paramount. Begin by emptying the fridge, discarding expired items and leftovers that have long overstayed their welcome. Once cleared, remove shelves and drawers for a more thorough clean.
Soak these components in warm soapy water or a vinegar solution to dissolve stubborn stains and odors. While these parts soak, focus on the interior surfaces of the refrigerator. Using a mixture of baking soda and water creates an effective paste for scrubbing away grime on the walls and bottom of the fridge.
This natural cleaner not only removes stains but also neutralizes odors. After scrubbing, wipe down all surfaces with a damp cloth to remove any residue. Once everything is clean and dry, replace the shelves and drawers before restocking the refrigerator with fresh food items.
Regularly deep cleaning the refrigerator not only promotes hygiene but also helps in maintaining optimal food storage conditions.
Deep Cleaning the Oven
| Task | Frequency | Time Required |
|---|---|---|
| Remove oven racks | Every deep clean | 5 minutes |
| Prepare cleaning solution | Every deep clean | 10 minutes |
| Apply the cleaning solution | Every deep clean | 15 minutes |
| Scrub interior surfaces | Every deep clean | 20 minutes |
| Wipe down the interior | Every deep clean | 10 minutes |
| Clean oven racks | Every deep clean | 20 minutes |
| Reassemble oven | After cleaning | 5 minutes |
The oven is notorious for accumulating grease and food splatters, making it one of the most challenging appliances to clean. Start by removing any oven racks and soaking them in warm, soapy water to loosen baked-on residue. For the oven interior, many modern ovens come equipped with self-cleaning features; however, if this option is not available or preferred, a homemade cleaner can be created using baking soda and water.
Apply this paste generously to the interior surfaces, avoiding heating elements. Allow the baking soda paste to sit for several hours or overnight for maximum effectiveness. Afterward, use a damp cloth or sponge to wipe away the paste along with any loosened grime.
For stubborn spots, a plastic scraper can be employed to gently lift away debris without scratching the oven’s surface. Once cleaned, replace the racks and give the exterior a thorough wipe down with an all-purpose cleaner or vinegar solution. A clean oven not only enhances cooking performance but also reduces smoke and odors during use.
Deep Cleaning the Microwave
Microwaves often become neglected in regular cleaning routines due to their compact size and hidden messes. To begin deep cleaning this appliance, fill a microwave-safe bowl with water and add slices of lemon or a few tablespoons of vinegar. Place this bowl inside the microwave and run it on high for several minutes until steam builds up on the walls.
This steam loosens food particles and makes wiping down surfaces much easier. After allowing the microwave to cool slightly, carefully remove the bowl and wipe down all interior surfaces with a damp cloth or sponge. Pay special attention to corners where food particles tend to accumulate.
For stubborn stains or burnt-on food, a paste of baking soda and water can be applied directly to those areas before scrubbing gently. Finally, don’t forget to clean the microwave’s exterior, including buttons and handles, which can harbor germs from frequent use.
Deep Cleaning the Dishwasher
/how-to-clean-the-dishwasher-1900465_07-6452d6083d11478497770f43bfd83258.jpg)
Dishwashers are designed to clean dishes, but often require their own deep cleaning regimen to function effectively. Start by removing any debris from the bottom of the dishwasher, including food particles that may have accumulated in the filter or drain area. Consult your dishwasher’s manual for instructions on how to access and clean these components properly.
Next, run an empty cycle with a cup of white vinegar placed in a dishwasher-safe container on the top rack. The vinegar will help dissolve grease and remove odors from inside the appliance. For additional cleaning power, consider sprinkling baking soda on the bottom of the dishwasher after running the vinegar cycle and running another short cycle.
This combination not only cleans but also deodorizes your dishwasher, ensuring that it continues to provide sparkling clean dishes.
Deep Cleaning the Coffee Maker
Coffee makers are often overlooked when it comes to deep cleaning, yet they can harbor mineral deposits and coffee oils that affect flavor over time. To begin this process, fill the water reservoir with equal parts water and white vinegar. Run a brewing cycle without coffee grounds to allow the vinegar solution to clean internal components effectively.
After completing this cycle, run two or three cycles with plain water to rinse out any remaining vinegar taste or odor. Additionally, don’t forget to clean removable parts such as carafes and filters in warm soapy water or in the dishwasher if they are dishwasher-safe. Regularly deep cleaning your coffee maker not only enhances the taste of your brew but also prolongs its lifespan by preventing mineral buildup.
Deep Cleaning the Toaster
Toasters can accumulate crumbs and debris that may pose fire hazards if left unattended. Begin by unplugging the toaster and removing any detachable crumb trays; these should be emptied and washed with warm, soapy water. For non-removable trays, carefully shake out crumbs over a sink or trash can.
Next, use a soft brush or cloth to clean the exterior surfaces of the toaster, paying attention to any crevices where crumbs may hide. A damp cloth can be used for stainless steel models to restore shine without scratching surfaces. Avoid submerging any part of the toaster in water or using abrasive cleaners that could damage its finish.
Regularly deep cleaning your toaster not only ensures safety but also maintains its appearance.
Deep Cleaning the Blender
Blenders are essential kitchen tools that can quickly become dirty after use due to food residue clinging to blades and containers. To deep clean a blender effectively, fill it halfway with warm water and add a few drops of dish soap. Securely attach the lid and blend on high for 30 seconds; this will dislodge stuck-on food particles.
After blending, rinse out the container thoroughly with warm water before washing it with soap and a sponge for any remaining residue. For stubborn stains or odors, baking soda can be sprinkled inside before rinsing again. Don’t forget to wipe down the base of the blender with a damp cloth to remove any spills or splatters that may have occurred during use.
Deep Cleaning the Food Processor
Food processors are versatile appliances that require regular maintenance to ensure optimal performance. Start by disassembling all removable parts such as bowls, blades, and lids. These components should be washed in warm, soapy water or placed in the dishwasher if they are dishwasher-safe.
For deep cleaning the base of the food processor, use a damp cloth to wipe down surfaces while being cautious around electrical components. If there are stubborn stains or food residues stuck in crevices, a soft brush can help dislodge them without damaging any parts. Regularly deep cleaning your food processor not only keeps it hygienic but also ensures that it operates smoothly without any hindrances from built-up debris.
Maintenance Tips for Keeping Appliances Clean
Maintaining cleanliness in kitchen appliances requires consistent effort, but can be simplified with some practical tips. One effective strategy is to establish a regular cleaning schedule tailored to each appliance’s usage frequency; for instance, daily maintenance for high-use items like blenders or coffee makers, while reserving deeper cleans for less frequently used appliances like ovens or dishwashers. Additionally, implementing preventive measures can significantly reduce buildup over time.
For example, placing mats under appliances can catch spills before they reach countertops or floors; using lids on pots while cooking can minimize splatter onto stovetops; and promptly wiping down surfaces after use prevents grime from hardening into stubborn stains later on. By adopting these habits alongside regular deep cleaning sessions, homeowners can enjoy cleaner appliances that function efficiently while contributing to an overall healthier kitchen environment.
If you’re interested in maintaining a spotless home beyond just your kitchen appliances, you might find the article on window cleaning particularly useful. This guide offers valuable insights into achieving streak-free windows, which can complement the cleanliness of your kitchen by allowing more natural light to brighten up the space. By integrating these cleaning tips, you can ensure that every corner of your home, from your kitchen appliances to your windows, is sparkling clean.
FAQs
What is deep cleaning for kitchen appliances?
Deep cleaning for kitchen appliances involves thoroughly cleaning and sanitizing the interior and exterior of appliances such as refrigerators, ovens, microwaves, and dishwashers. This process helps to remove built-up grime, food residue, and bacteria, ensuring that the appliances function efficiently and hygienically.
Why is it important to deep clean kitchen appliances?
Deep cleaning kitchen appliances is important for maintaining a clean and hygienic kitchen environment. It helps to prevent the growth of bacteria, eliminate food odors, and prolong the lifespan of the appliances. Additionally, regular deep cleaning can improve the efficiency and performance of the appliances.
How often should kitchen appliances be deep cleaned?
The frequency of deep cleaning kitchen appliances depends on usage and the specific appliance. As a general guideline, refrigerators and ovens should be deep cleaned every 3-6 months, while microwaves and dishwashers can be deep cleaned every 1-2 months. However, heavily used appliances may require more frequent deep cleaning.
What are the steps involved in deep cleaning kitchen appliances?
The steps for deep cleaning kitchen appliances typically include removing and cleaning removable parts, wiping down the interior and exterior surfaces, using appropriate cleaning solutions, and sanitizing surfaces. Specific steps may vary depending on the type of appliance being cleaned.
What are some tips for deep cleaning kitchen appliances?
Some tips for deep cleaning kitchen appliances include using natural cleaning solutions, such as vinegar and baking soda, to avoid harsh chemicals. It’s also important to follow the manufacturer’s instructions for cleaning and maintenance, and to regularly check and clean the appliance’s filters and seals. Additionally, allowing the appliances to fully dry before use is essential.